How to Install an LED Flood Light: Steps, Wiring and Height
How to install an LED flood light comes down to five decisions made in order: the wattage, where it mounts, how high, which way it points, and how the supply reaches it without letting water in. Below we walk through each one, with the wiring colours, a step-by-step fixing sequence, common height and angle starting points, and the mistakes that make a new flood light flicker, glare or fail in its first monsoon. Wiring work is for a licensed electrician, with the circuit switched off at the MCB.
Key takeaways
- Pick the watt by the area — 10W to 15W for a gate or porch, 30W to 50W for a compound or parking, 100W and up for open ground.
- Mount it high and aim it down — around 2.5 to 3 m for a gate, higher for larger areas, tilted down so the beam lands on the ground, not in eyes.
- Three wires — phase through the switch, neutral, and earth to the metal body. Check the colours on the label.
- Seal the joint — a weatherproof junction box, a tight cable gland and a drip loop.
- Safety — switch the MCB off and test dead before touching any wire; anything beyond a like-for-like swap is an electrician’s job.
How to install an LED flood light: the short answer
An LED flood light is a fitting that throws a wide wash of light over a gate, wall, yard or signboard. Installing one means fixing a bracket to a solid surface, mounting the fitting on it, bringing a switched supply to it through a sealed joint, connecting phase, neutral and earth, and then aiming it after dark.
The order matters. The wattage decides how high the light must go. The height decides the angle. The position decides where the cable runs and where the switch sits. Getting these right on paper takes ten minutes and saves a second visit with a ladder.
We make LED flood lights, from a 10W Ultra Prime to a 200W fitting, and wall mounting brackets for them, at our works in Marol, Andheri East, Mumbai. This guide is about fitting them well. If you are still choosing between a flood light, a bullet light and a gate light, our guide to outdoor lights for home compares them first.
Throughout, the rule is the same: switch off the MCB for the circuit, prove it is dead with a tester, and use a licensed electrician for anything beyond a simple replacement.
What do you need before installing a flood light?
Before installing a flood light you need the fitting, a bracket suited to its size, wall plugs and screws for the surface, round outdoor-suitable cable of the right size, a weatherproof junction box, a switch on the phase, a line tester or multimeter, a drill, and a safe ladder or platform with a second person holding it.
Flood light Bracket Wall plugs and screws Round sheathed cable Weatherproof junction box Cable gland Switch Tester Ladder and a helper
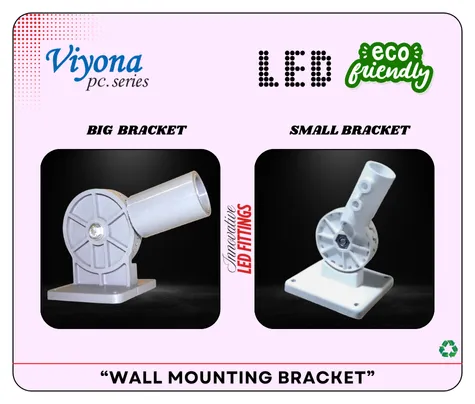
Our wall mounting brackets come in two sizes: 1082 at ₹90 and 1083 (big) at ₹180 MRP. Ask your dealer which suits the wattage you are fitting.
For the cable, lighting circuits in homes are commonly run in 1.5 sq mm copper, but the run length and the light’s wattage decide the final size. Our house wire guide covers sizes.
Never work on a flood light from a chair, a parapet or an unsecured ladder. Most outdoor-light accidents are falls, not shocks.
| Spot | Starting wattage | Typical height | Our starting code |
|---|---|---|---|
| Gate or porch | 10W to 15W | 2.5 to 3 m | 1080, 10W, ₹490 |
| Terrace or compound wall | 15W to 30W | 3 to 4 m | 1081, 15W, ₹550 |
| Parking or yard | 30W to 50W | 4 to 6 m | 1086, 30W, ₹1,100 |
| Building front | 50W to 100W | Depends on the facade | 1087, 50W, ₹1,450 |
| Open ground | 100W to 200W | 6 m and above | 1089, 100W, ₹1,950 |
Which watt flood light do you need?
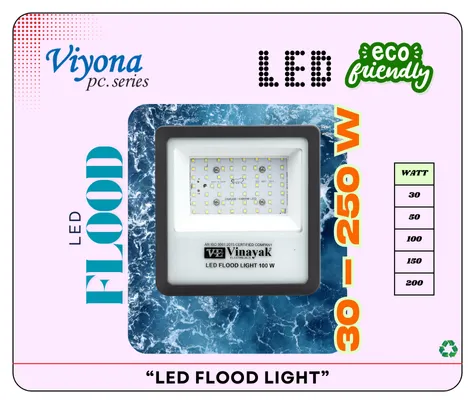
As a starting point, a 10W or 15W LED flood light suits a gate, porch or small entrance, 30W to 50W a compound, terrace or parking area, 100W a large yard or building front, and 200W open ground or a large signboard; the exact wattage depends on the area, mounting height and how bright you want it.
Our LED flood light wattages and where each typically starts
Wattages from our current catalogue. The uses are general practice, not a lighting calculation. Bar length is watts with 200W as the full bar, rounded to the nearest 5%.
Watts measure power drawn, not light given out. Two fittings of the same wattage can differ in brightness, which our guide to lumens vs watts explains. Every code and MRP for our flood lights, including the lens versions at 50W, 100W and 200W, is in our LED flood light and street light price list.
Bigger is not better on a home. An over-powered flood light glares into neighbours’ windows and costs more to run all night.
Switch off the circuit and test the point dead before touching a wire.
Light the ground, not the eyes of anyone walking in.
Connect the earth lead to the metal body’s earth conductor.
Junction box, tight gland, drip loop; never tape in the open.
How high should a flood light be mounted?
A common starting point is about 2.5 to 3 metres above the ground for a gate or porch flood light, 3 to 4 metres for a terrace or compound wall, 4 to 6 metres for a parking area or yard, and higher for open ground, so that the beam spreads evenly and the fitting is out of easy reach.
Typical mounting height starting points (metres, upper end)
General practice, not a test result or a design calculation. Bar length is the upper height with 9 m as the full bar, rounded to the nearest 5%.
Height and wattage go together. A high-wattage light mounted low makes a bright hot spot and long, hard shadows. A small light mounted high spreads thin. As a rule of thumb, the higher the mount, the higher the wattage the spot can use.
Height also keeps the fitting out of reach of passers-by and away from splashing at ground level. Fix the bracket to solid masonry or a steel member, never to a loose plaster skin or a thin sheet.
What angle should a flood light point?
A flood light should point downward, not out to the horizon, with the centre of the beam aimed at roughly the middle to far side of the area you want lit; tilting it down keeps light on the ground, cuts glare into eyes and neighbouring windows, and helps rain run off the glass.
Start with the fitting tilted well below horizontal and adjust after dark. A light aimed at or above the horizon wastes light into the sky and dazzles anyone walking towards it, which hides rather than reveals.
For a gate, aim at the ground just outside it, so a visitor’s face is lit and not your own camera. For a building front, mount low and aim up only if the fitting is made to be used that way; check the box. For a yard, two smaller lights from different corners usually beat one big light, because they fill each other’s shadows.
Tighten the bracket’s angle bolts after aiming. A flood light that droops in the first strong wind ends up lighting the wall below it.
Flood light wiring: which wire goes where?
A mains LED flood light has three wires to connect: phase (live) goes to the supply through the switch, neutral goes to the supply neutral, and earth goes to the earth conductor; the colours vary between makers, so read the label on the lead before connecting anything.
Phase is the live wire. The switch must break the phase, never the neutral, so that the fitting is dead when switched off. Neutral completes the circuit. Earth connects the metal body to the earth conductor, so a fault inside trips the protection instead of making the body live.
House wiring in India commonly uses red or brown for phase, black or blue for neutral and green or green-yellow for earth. A fitting’s own lead may follow a different convention, which is why the label wins. Our guide to the difference between phase, neutral and earth explains each one.
If the point has no earth wire, do not leave the green lead loose and taped. Ask an electrician to run an earth conductor; types of earthing covers how a home is earthed.
Never connect a metal-bodied flood light without an earth. A loose internal wire can make the whole body live with nothing to trip.
How do you install a flood light step by step?
To install a flood light: switch off the MCB and test the point dead, mark and drill the bracket holes, fix the bracket, mount the fitting, run the cable through a gland into a weatherproof junction box, connect phase, neutral and earth, close and seal the box, then restore power and test.
1. Isolate Switch off the MCB for the circuit, not just the wall switch, and confirm with a tester that the point is dead.
2. Mark and drill Hold the bracket in place, mark the holes level, drill and insert wall plugs.
3. Fix the bracket Screw it tight to solid masonry. Our 1082 and 1083 brackets are made for this.
4. Mount the light Bolt the fitting to the bracket, leaving the angle bolts finger-tight.
5. Connect Bring the supply cable and the light’s lead into the junction box through glands, and connect phase to phase, neutral to neutral, earth to earth with proper connectors.
6. Seal and test Close the box, check the glands are tight, restore the MCB and switch on.
Leave the final aiming for after dark.
How do you connect a flood light to a switch, timer or sensor?
A flood light is usually controlled by an ordinary one-way switch on the phase, placed indoors near the door; a timer or a motion or daylight sensor can sit in the same phase line, provided its rating suits the light and it is installed as its maker instructs.
An indoor switch stays dry and is easy to reach at night. Our VIYONA deluxe 6A one-way switch 101 is ₹22 MRP, and a matching indicator lets you see from inside that the outdoor light is on.
We do not make timers or sensors. If you add one, check its rated load against the flood light and its driver, and fit it in a sheltered spot. A sensor aimed at a road will switch on with every passing car.
Several flood lights on one switch add up. Count the total watts before choosing the switch and the MCB for that circuit; lighting circuits in homes are commonly on a 6A or 10A MCB.
Put the switch where you will look for it. Next to the main door, at the usual switch board height, is the common choice.
How do you keep water out of a flood light?
You keep water out of a flood light by mounting it the way its maker shows, using round cable that the gland grips all round, making every joint inside a weatherproof junction box, and leaving a drip loop below the cable entry so rain runs off before it reaches the fitting.
Drip loop Let the cable hang below the entry before rising to it.
Gland tight A gland seals only on a round cable of the size it was made for.
Tape in the open Insulation tape is not a weather seal. It peels in the first summer and lets water in.
Entry at the bottom If the fitting allows it, keep the cable entry facing down.
The IP rating on a flood light describes how well its enclosure keeps out dust and water when fitted as intended. Our guide to IP65 vs IP66 explains the two digits and which suits a sheltered wall versus an open roof. Our printed catalogue does not state an IP rating for our flood lights, so ask your dealer for it against the exact code before fitting one somewhere fully exposed.
How do you test and adjust a flood light after installation?
Test a new flood light by switching it on from the indoor switch, checking it lights fully and steadily, then returning after dark to adjust the angle so the beam covers the area without glare, and finally tightening the angle bolts and checking the junction box once more after the first heavy rain.
Steady light A new LED fitting should light instantly and evenly. Flicker or a faint glow when switched off usually points to the switch being on the neutral, a loose connection, or a driver problem. Our guide to why an LED light flickers works through the causes.
Walk the area Stand where a visitor would. If the light is in your eyes, tilt it down. If the far side is dark, tilt it up a little or add a second fitting.
After the first rain Check for condensation inside the glass and water in the junction box. Either means a seal needs redoing, with the MCB off.
Any adjustment that means opening the fitting or the junction box starts with the MCB off and the circuit tested dead.
What are the most common flood light installation mistakes?
The most common flood light installation mistakes are choosing too high a wattage for a home, mounting too low, aiming at the horizon, switching the neutral instead of the phase, leaving the earth unconnected, and joining the supply with tape in the open instead of inside a weatherproof junction box.
Switch on the neutral The light goes off but the fitting stays live.
Earth left loose A fault can make the metal body live.
Taped joint outdoors Water gets in, then the MCB trips or the light fails.
Aimed at the horizon Glare for everyone, light for nobody.
Too many watts Hard shadows and a higher bill for a light that runs all night.
Bracket on plaster The fitting sags or falls.
If you are planning the rest of the house too, our guide to outdoor lights for home covers gate, compound and bullet lights, and our LED flood light page lists every code we make.
FAQs
How do you wire an LED flood light?
How high should a flood light be installed?
Which watt flood light is best for home?
Does a flood light need an earth wire?
At what angle should a flood light be installed?
Can I install a flood light myself?
Why buyers choose Vinayak Electricals
- LED flood lights from 10W to 200W, standard and lens, made at our works in Marol, Andheri East, Mumbai.
- Wall mounting brackets 1082 at ₹90 and 1083 (big) at ₹180 MRP, from the same catalogue as the lights.
- Spare LED street and flood light drivers registered to IS 15885 (R-71026310).
- Switches for the indoor control point, made to IS 3854 under BIS licence CM/L-7567794.
- MRPs published openly; sold through 500+ dealers in full boxes, with delivery across India.
- Manufacturing in Mumbai since 1995; ISO 9001:2015 certified.
LED flood lights and brackets
See every wattage and MRP of our VIYONA LED flood lights, then order through a dealer or call us.
View LED flood lights